• 1/2 cup unsalted butter (melted)
• 1 cup granulated sugar
• 1/4 cup unsweetened cocoa powder
• 1/2 tablespoon red food coloring
• 1/2 teaspoon vanilla extract
• 1/8 teaspoon salt
• 1/2 teaspoon white vinegar
• 2 large eggs
• 3/4 cup all-purpose flour
For the Cheesecake Layer:
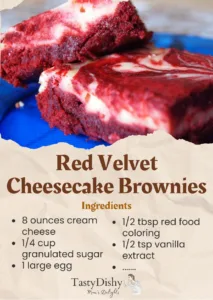
• 8 ounces cream cheese (softened)
• 1/4 cup granulated sugar
• 1 large egg
• 1/2 teaspoon vanilla extract
Instructions:
1. Preheat the Oven and Prepare Pan:
• Preheat your oven to 350°F (175°C).
• Line an 8-inch square baking pan with parchment paper, leaving an overhang on the sides to lift out the finished brownies easily.
2. Make Red Velvet Brownie Layer:
• In a large bowl, combine melted butter and 1 cup of sugar.
• Stir in cocoa powder, red food coloring, 1/2 teaspoon vanilla extract, salt, and vinegar, mixing well.
• Whisk in the eggs one at a time.
• Gently fold in the flour until just combined.
• Reserve 1/4 of the batter for the topping and spread the remaining batter into the prepared baking pan.
3. Make Cheesecake Layer:
• Using a mixer, beat the cream cheese and 1/4 cup sugar until smooth.
• Add the egg and 1/2 teaspoon vanilla extract, continuing to beat until fully combined.
• Spread the cheesecake mixture over the brownie layer in the pan.
4. Add Final Touches:
• Dollop the reserved brownie batter over the cheesecake layer. Using a knife or skewer, drag the tip through the batter to create a swirl pattern.
5. Bake:
• Bake for 35-40 minutes, or until the cheesecake layer is set and edges are lightly browned.
• Let it cool completely in the pan on a wire rack.
6. Chill:
• Once cooled, refrigerate the brownies for at least 3 hours, or until firm.
7. Serve:
• Use the parchment paper overhang to lift out the brownies from the pan. Cut into squares and serve chilled.
Notes:
• Use a toothpick to check the doneness; if it comes out mostly clean with a few moist crumbs, the brownies are done.
• The swirling part is more for aesthetics, so have fun with it!
Leave a Reply